How to Use NordVPN
NordVPN is a highly trusted privacy software. Our world is becoming more and more digital every day, and it is therefore important to find the right tools to keep you secure while online. Buying a leading VPN is just the first step. To stay anonymous at all times you have to know how to use it. This article is a guide on how to use NordVPN.
We will talk about how to use NordVPN on Firestick, how to use NordVPN on Kodi and how to use NordVPN with uTorrent.
Before we begin, let's look at why NordVPN is such a good choice. There are many things to like about NordVPN. It is consistently listed as one of the fastest (if not the fastest) VPNs available. That's not all.
NordVPN is highly secure. It conducts independent audits from time to time (available on their website) to prove that it doesn't keep logs. It also blocks ads, uses double servers that offer double encryption, and has a kill switch in case your internet connection drops.
The software has measures in place to ensure zero IP and DNS leaks, can hide LANs, has dedicated servers, and its Onion Over VPN servers gives you additional protection when you are using TOR.
Table of Contents
How to Use NordVPN on Desktop or Mobile
Before we get into how to use NordVPN on specific devices, it may be worthwhile to take a moment to explain how to use NordVPN on desktop and mobile.
The first step is to download NordVPN. After it downloads open the installation file and allow it to make changes to your device. An installer window will appear. Click “Install” and allow the process a few seconds to complete.
Once the installation is done you'll see a NordVPN icon on your screen. Click on it, and you'll see a login window that asks for your username and password. Use your credentials to log in.
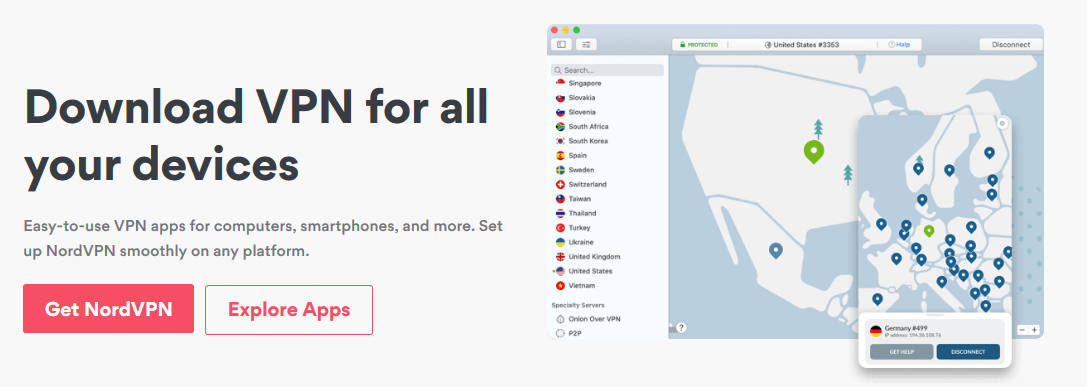
The next screen has a list of countries (servers) to the left, and a map on the right. You can choose the country you would like to connect through, and you'll see that country's servers on the map. Choose any server, and you will be connected after a few seconds. When you are connected, the pin on the server will turn to green.
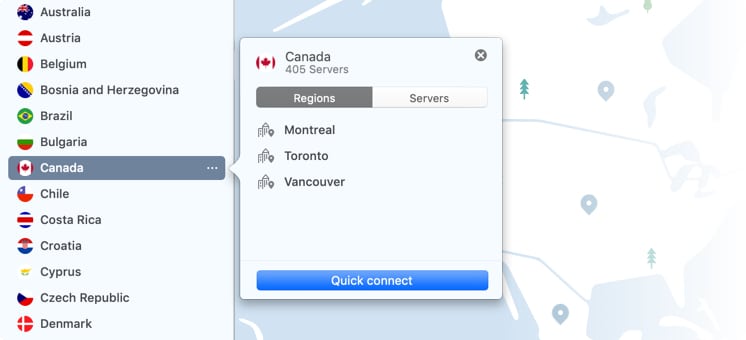
Alternatively, you can choose the “Quick Connect” option which connects you through a recommended server (nearest and fastest).
If you would like to connect through a specific server but you cannot see it on the list, you can search for it using the search bar provided at the top of the screen.
If you install NordVPN correctly it will appear as a shortcut on your system tray where it runs quietly in the background. You can click here to change your server or settings.
In “Settings”, there are a few things we recommend:
- Make sure CyberSec is on. It blocks malware, advertisements and all online threats.
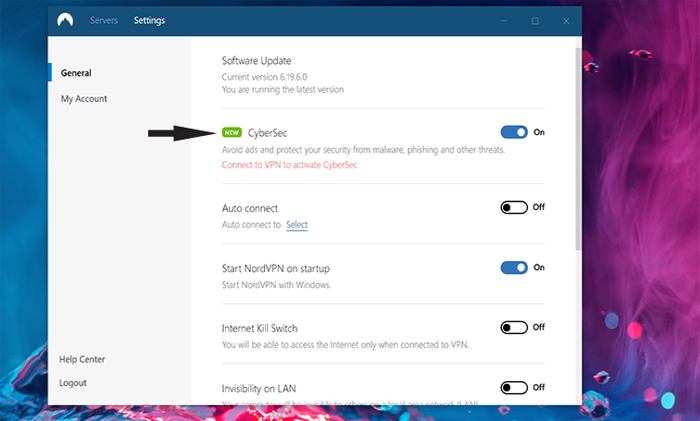
- Turn on “Auto-Connect” so that every time you turn your computer on you are connected to a server automatically.
- Allow NordVPN to launch at start-up for convenience, and so that you don't have to remember to turn it on every time.
- Enable the Kill Switch. In case you lose your NordVPN connection your internet is cut off, which stops your details from getting leaked.
- If you don't want your device to be visible on LAN, you can activate “Invisibility on LAN”.
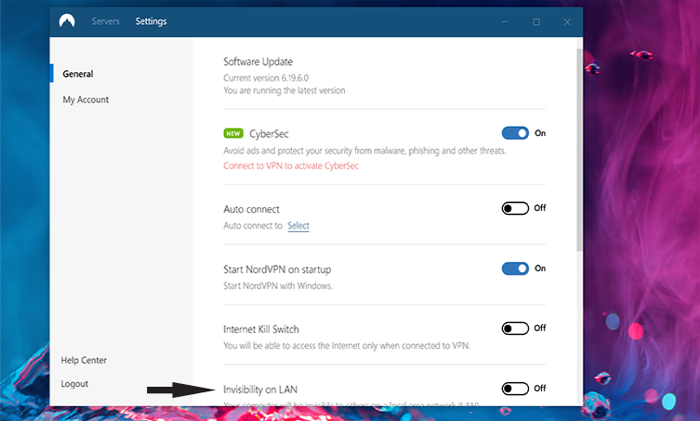
- You can enable notifications so that you are alerted every time you are connected or disconnected to a server.
These steps work whether you are installing NordVPN on Windows or Mac. For Mac, once the app downloads you will have to go to Launchpad and click on the icon to install.
You'll be asked for permission to install Helper; add your password to allow the software to create a VPN tunnel. After entering your credentials just click “Agree & Continue”. NordVPN is now active on your Mac device, and you are secure.
Installing on mobile isn't very different. Different mobiles might vary slightly in the installation process. Just download the software and then allow it to install automatically. Log in and then choose a server and adjust settings to make sure you are protected at all times.
How to Use NordVPN on Firestick & Fire TV
NordVPN has a native app for Amazon TV devices. A native app is one that is developed for a specific device and comes loaded with functionalities to make them faster, more flexible and convenient than generic devices. However, the app only works for second-generation Firestick and Fire TV and onwards.
When you install NordVPN on a Firestick or Fire TV you are able to unblock geo-blocked content, and no one can see what you stream or when you stream it.
This guide assumes that you already have an active NordVPN subscription. To install and use NordVPN on Firestick here is what you need to do:
- Using your TV remote, go to the search icon on the top left of your TV screen. Type in “NordVPN”. You will get several results. Click on the first one.
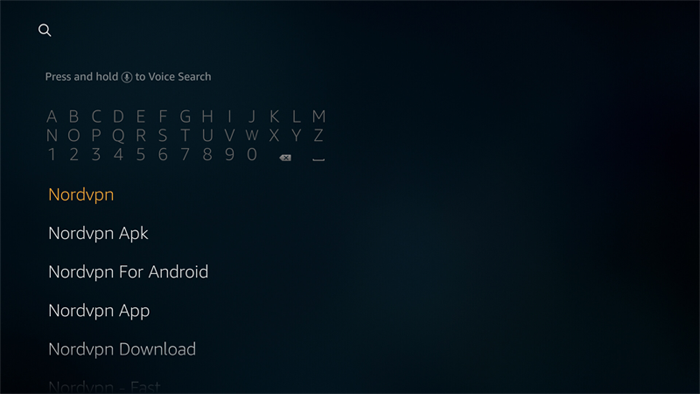
- You'll be redirected to an Apps and Games page that has several icons, including NordVPN. Highlight and click on it.
- The next screen allows you to download the VPN software. Click “Get” and allow the process a few seconds to complete. Once done, click “Open” and then log in using your NordVPN credentials.
- After you log in you will see a couple of buttons: “Connect Now” and “Search”. Across the bottom of your screen, you will see all the countries that have NordVPN servers and the different types of connections (DoubleVPN, P2P, etc).
- You can get connected right away by clicking “Connect Now”, or you can click to select a specific country. You'll be asked for permission to connect NordVPN, and also whether you trust the application. Click yes for both and then click OK. Your Firestick is now protected by NordVPN.
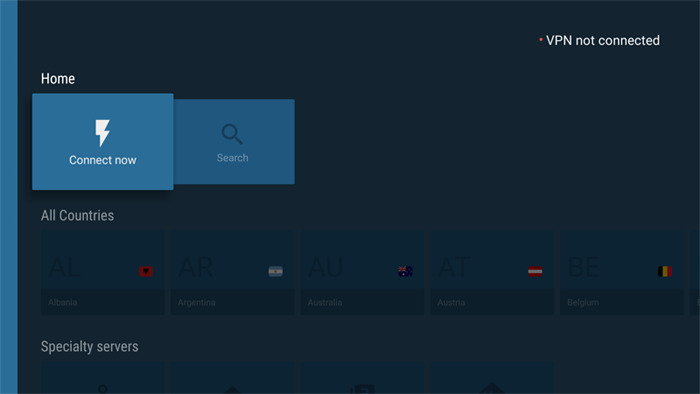
- To exit the NordVPN screen hit the “Home” button on your remote. If you would like to disconnect the VPN completely, you can click “Disconnect” within the app.
How to Use NordVPN on Kodi
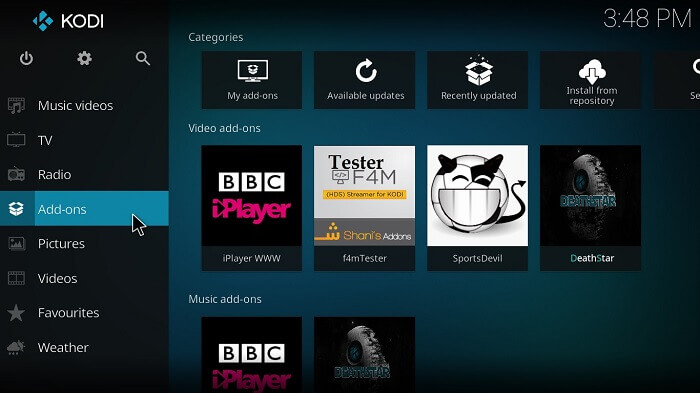
NordVPN is recommended for Kodi for a couple of reasons: the first is that it's fast. To stream content, you need a connection that's fast and that has proper security protocols so that you're safe from prying eyes. NordVPN offers that and more. The installation process is rather easy.
All you have to do is make sure that you have NordVPN installed and running on the device you use to run your Kodi box. If, for example, your Kodi box is connected to your Android TV, just install NordVPN on the TV.
How to Use NordVPN with uTorrent (& Torrenting in General)
NordVPN has SOCKS5 proxy servers which makes it perfect for torrenting activities. If you torrent through a SOCKS5 proxy server, it assigns you a new IP address, which gives you complete anonymity. Here is how to use NordVPN with uTorrent and other torrent clients:
- Download and install NordVPN on your device, and then log in.
- On the server page, you will notice that some servers are marked as “P2P”. This means that they are specifically for torrenting (they have SOCKS5). Choose the server that you would like to torrent through.
- After you choose a server, you have to change a few settings in uTorrent. Open it, and go to “Options”, “Preferences” and then “Connection”. Under Proxy Server select SOCKS5. Tick every box in that section.
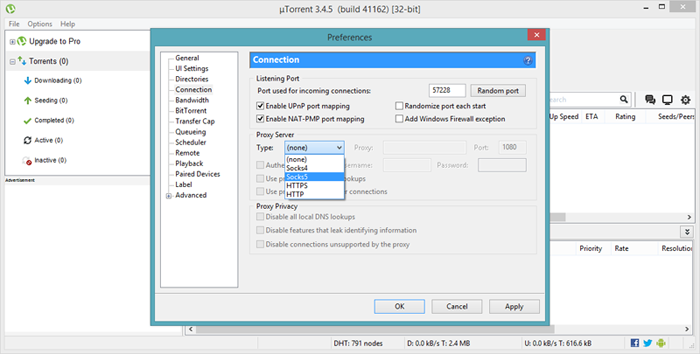
- Copy the proxy server name from the website and paste it into the proxy box. For the port, type 1080, and then enter your user name and password. Click “Apply” and then “OK”.
- Now uTorrent is protected with NordVPN and you can torrent away from prying eyes.
A quick note: every time you want to torrent a file you will see offers for free VPNs from the torrent site. Tempting as these may be, you shouldn't fall for them. They do not provide the kind of protection that you would get from paying for a proper VPN, and will end up flooding your device with ads and malware. You are much better off paying for proper software like NordVPN.
Conclusion
If you want to enjoy anonymity, you have to know how to use NordVPN on your desktop, Firestick, Kodi, uTorrent and other devices. The process of installing it may seem a little complicated at first, but if you follow the step by step instructions provided in this guide you should be able to do it successfully.
If you get stuck at any point you can contact NordVPN customer support for assistance.


